Should you use screw-on filters or square/rectangular filters for your photography?
Today I thought we would consider the differences between the two main types of photographic filter, and then weigh up the pros and cons of each of them for specific types of photography. My chosen writing topics are usually triggered by things I’m doing with my own photography business and this was something I’ve been looking at recently. My filter kit is a bit beat up and I’ve not been entirely happy with all the choices I made when I put this set together. As I started to put a new kit together, shaped by more years of experience in the field, I decided to swap a few square filters for some round, screw-on ones this time around and that’s what started this post.
Screw-on circular filters

These filters screw onto the thread on the front of your lens. The size of filter you need is dependant on the diameter of your specific lens and you must have a filter that is at least as wide as the diameter of your largest lens. For example, if you have a lens that has a 77mm thread, and a lens that has a 67mm thread, you would buy a 77mm filter and then use a “step up” thread adapter to allow you to mount the 77mm filter on a 67mm thread. You cannot go the other way though, because a 67mm filter would not cover the full width of the 77mm lens and would therefore be visible in your photo.
For most people, conundrums surrounding choice of filter sizes for their lenses is the biggest issue with filters. If you have many lenses with many different thread sizes then you have to carry lots of different adapter rings. These adapter rings can easily get stuck on filters and become a real pain to deal with in cold weather. Ideally, you would only ever buy filters that are the same size as your lens, but that’s not financially practical for a lot of people, especially with expensive polarizing filters.
Another potentially problematic scenario is that you buy filters for one size of lens, and then later you realize you want to get a lens that has a wider filter thread. Now all your filters are too small for that new lens and there’s nothing you can do about it. This happened to me when Canon released their 24-70 f/2.8 L II which has an 82mm filter thread. All Canon’s previous L-Series lenses had a 77mm filter thread so that is the size of filter I have been buying for years. Suddenly I had to buy new 82mm filters and it cost me many hundreds of dollars!
Let’s break it down before talking a bit more:
Pros
- Can be left on the lens for faster setup
- Can be easily stacked together by screwing them together
- Smaller and easier to store
- More durable
Cons
- Adapter rings are necessary to fit a single filter to multiple lens sizes
- Can get stuck on lenses and be hard to handle in cold weather
For many people, the reason for using screw-on filters rather than square or rectangular ones comes down to portability and ease of use. Screw-on filters can be fitted very quickly and there’s no requirement to bring anything else with you other than the filters themselves. A lot of times you can even leave filters attached to the lenses while shooting a similar scene from multiple angles. If you’re out for a day of landscape photography, there’s a good chance you can just leave your screw-on circular polarizer on the lens all day and then it’s ready at a moment’s notice. Multiple screw-on filters are also easy to pack in your bag in small filter wallets, and they are pretty durable unless you hit them hard with a blunt object or drop them on rock or concrete.
There are lots of types of screw-on filters, but the most common ones are UV filters which people often use for lens protection, neutral density filters for achieving a slower shutter speed in landscape shots, or a circular polarizer for cutting down reflections on water or enhancing colour in the sky.
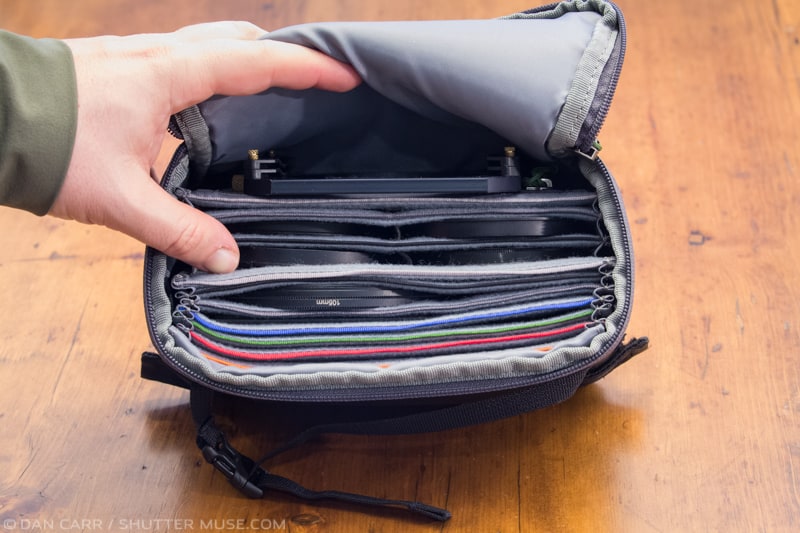
My current filter kit in a MindShift Filter Hive case (Review of the case here.)
Square & rectangular filters
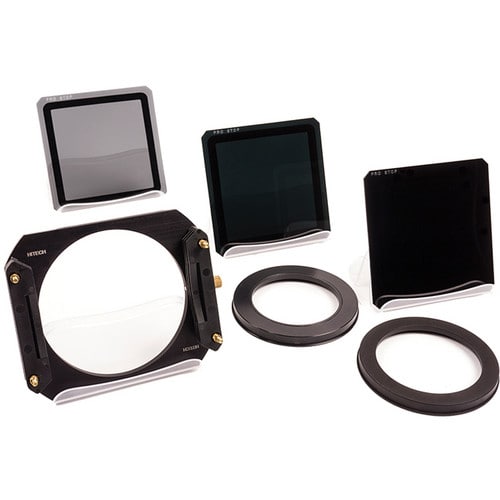
Formatt Hitech filters and 100mm filter holder
These filters are made from glass or resin, and are typically used in conjunction with a filter holder that attaches to the front of a lens. They come in a variety of sizes to suit different camera types, but for DSLRs, by far the most common are the 100mm (4 inch) type. The square filters are therefore 4×4 inches, and rectangular ones for the same system are 4×6 inches. Just like screw-on filters, these square/rectangular ones come in a variety of types, although the most common are neutral density filters (square) and graduated neutral density filters (rectangular).
The main benefit of this system is that you don’t need to get different sized filters to fit different sized lenses. Instead, all you need is a variety of adapters for your filter holder that are specific to the diameter of your lens. The filter holder adapter screws on to the lens, and then the filter hold attaches to the adapter. The adapters are cheap, so it’s not a problem to adapt a large variety of lens diameters to work with a single filter holder and set of square filters. It’s also relatively easy to stack multiple filters together as most holders will have multiple filter slots. This allows you to easily use multiple ND filters simultaneously, or an ND and a graduated ND at the same time. Conversely, stacking multiple screw-on filters together often results in vignetting unless you are using more expensive ultra thin filters. The thinner glass or resin square filters don’t cause vignetting quite so easily, but make sure you put them in the filter slots closest to the lens element.
Pros
- One set of filters can be easily used with many lenses
- Easy to stack multiple filters
- Easily adjustable filter position for using graduated filters
Cons
- Physically larger than screw-on filters and also more fragile
- Very long exposures require a filter holder to be carried
- Possible vignetting from filter holder on wider lenses

4×6 graduated neutral density filter
One thing that I want to point out is that you don’t need to use a filter holder for a graduated neutral density filter. It’s perfectly possible to hold a grad filter up against a lens for a shot lasting a few seconds. This is plenty of time for many landscape photography scenarios, so don’t assume you have to have a filter holder if you’re going to use anything other than screw-on filters. You could very easily use a screw-on polarizer and a hand-held rectangular grad ND. Now, if you want to shoot long exposures of water or moving clouds, then you’re going to want to use the filter holder for your NDs at that point. It’s not possible to hand-hold an ND for several minutes without moving it about and accidentally letting light in at the edges.
A note on circular polarizers
Circular polarizers are almost always of the screw-in variety because you need to be able to rotate them to any angle to find the best setting for the angle of light falling on your particular scene. Whilst it is possible to purchase a square polarizer, it doesn’t make much practical sense because if you rotated the square filter holder to adjust the polarization, you wouldn’t be able to use the holder for any graduated neutral density filters at the same time. Since a filter holder and a square polarizer are much more cumbersome to carry and use than a screw-on filter, there’s really no reason to give it a try.
If you’re wondering how you go about using the suggested round polarizer as well as a filter holder for square or rectangular filters, then you have a few options:
- Use a screw-on polarizer that has another thread on the front of it, thereby allowing you to attach your filter holder to the front of the polarizer.
- Use a larger polarizer (often 105mm) that sits in a special thread on the front of a filter holder (see image below).
- Use any kind of screw-on polarizer and then hold your graduated neutral density filters in front of the polarizer whilst taking the shot. (My preferred method)
- Use a “Cokin style” polarizer that actually sits in the filter holder in one of the same kind of slots that usually holds your neutral density filter. (Example)
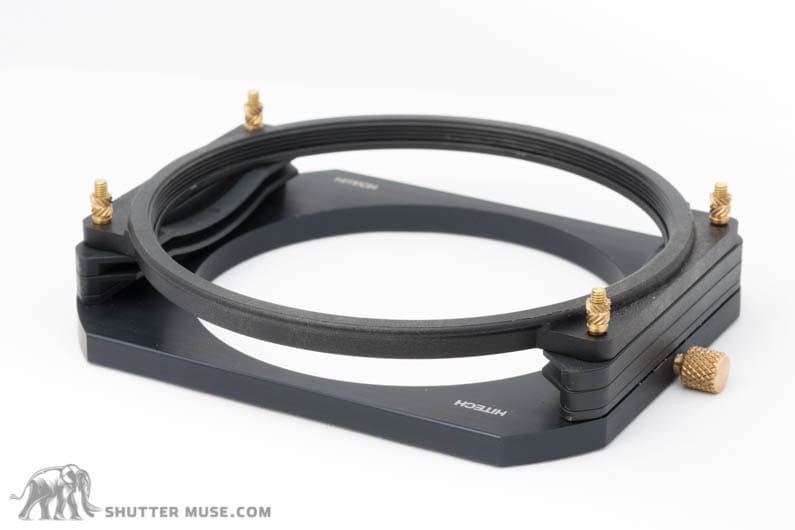
105mm thread on front of square filter holder. Usually used for a circular polarizer.
Which is the best method? All methods can get the job done, so there’s definitely some personal preference involved with this choice. Options 2 and 4 require purchasing polarizers that are effectively much larger in diameter than your lens. With high quality polarizers already being pretty pricey, this can make these larger sizes unpractically expensive for some people. It also means that you always have to have a filter holder with you, even if you’ve no intention of using other kinds of filters. Sometimes you might want to use a polarizer in a situation where ND filters simply aren’t necessary and I find it nice to be able to just carry a screw-on polarizer for that reason.
The main disadvantage of option 1 is that it moves the filter holder further away from the front element of the lens. This will slightly increase vignetting in the corners of your image so you may find that you can’t shoot at such a wide angle as you otherwise would do before the vegetating appears in the shot. It’s for this reason that I tend to use option 3 myself. With just a screw-on polarizer on the lens, and a hand-held graduated neutral density filter, I don’t have any vignetting problems.
A note on graduated neutral density filters
Whilst they aren’t seen very often, it is actually possible to get circular screw-on graduated neutral density filters. The great thing about rectangular graduated filters is that you can reposition the darker area of the filter over the bright portion of your image. You have some flexibility to shift it up or down, and sometimes set it at a slight angle. Screw-on graduated filters don’t have that flexibility, and the dark part of the filter tends to be positioned in the top 1/3 of the image. In many cases that’s probably still better than using no graduated filter when you have a bright sky in your shot, but it definitely limits potential and could force you into choosing your composition based on your filter design. If you only have one graduated ND filter, make it a rectangular one and not a screw-on one. The only scenario that I can think of where you might want to choose a circular graduated filter over a rectangular one would be when carrying the sometimes fragile rectangular filters isn’t possible. Glass graduated filters can be brittle, whereas a screw-on style one would fit into a small pouch and be a lot more durable.
Even this is a slightly dubious argument because these days glass filters aren’t the only option. Resin filters have come a long way and in fact that’s what I’ve been using for the last few years. They are much more durable than glass filters and I have no qualms about bringing them on even my most rugged trips.

Photographing the mysterious traveling rocks of the Racetrack Playa with a filter holder and graduated ND filter.
Using ND filters for wide aperture purposes
The majority of people use ND filters to cut down on light entering the camera and allow longer exposures that render movement in exciting ways in a photo, see the article on understanding shutter speed for more details. Sometimes, though, an ND filter is also used to allow you to shoot in bright light with a very wide aperture. If you wanted to get a very shallow depth of field then you have to shoot with a wide aperture but problems can arise on bright sunny days. Even at ISO 100, a wide aperture in the range of f/1.8 – f/1.2 can result in a necessary shutter speed that far exceeds that which a camera is capable of. Pro cameras usually max out at about 1/8000 of a second maximum shutter speed, but some will only go to 1/4000. If this shutter speed isn’t fast enough to allow a proper exposure at wide apertures, you’re forced to use a smaller aperture and hence get more depth of field.
For this reason, if you’re a portrait or fashion photographer then you might want to use an ND filter on your lens to cut down the overall exposure and force a slower shutter speed at that nice wide aperture you want to use! But would you use a round screw-on ND filter? Or a square one?
The choice is pretty clear in this case; a round filter would be the best option. Square filters that require filter holders are fine for using on a tripod, but they don’t really lend themselves to being used in a more fluid way as you would be in a portrait shoot scenario. Filter holders are a bit cumbersome and to be frank, most filter holders I have tried, do not feel that secure when mounted to the camera. They were designed to be used by landscape photographers with tripods, and not moved around frantically capturing multiple angles while a model is pulling 20 poses a minute in front of your camera.
There’s simply no way I would want to use a filter holder and a square filter for this kind of shooting. It would not be long before you knock it off the camera, or the constant switching from portrait to landscape loosened it and sent it crashing to the ground. Screw-on filters are the way to go if you are looking to work with wider apertures for portraits, wedding and street photography!
Using ND filters for shooting video
ND filters are often used when shooting video because shutter speeds need to be kept low in order for the video to have a fluid “filmic” look to it. A video with a shutter speed of 1/1000 for example, looks jittery and weird. The general rule with video is to use a shutter speed that is twice what your frame rate is. If you are shooting 29.97 fps video, you would use a shutter speed of 1/60 second. That’s actually a pretty slow shutter speed and it’s hard to achieve on a bright sunny day unless you always put your lens at f/32! ND filters allow the slower shutter speed and a wider aperture to be used. Whether you should use round or square filters for this will depend on your shooting style. If you are hand holding the camera in a “run and gun” style, I think screw-on filters make much more sense for all the reasons mentioned in the previous section. They’re just less likely to get in the way and get damaged! If you’re shooting from a tripod, though, there’s no reason not to use square style ones. In fact, many people use a matte box which is like a combination of a filter holder and a lens shade all in one. These cinema specific accessories often take a different size of ND filter, so be careful when purchasing.
Conclusion
Some choices are pretty clear. For circular polarizing filters you are better off getting a screw-on filter and for graduated neutral density filters your best option is rectangular filters. The main choice comes when choosing regular neutral density filters and speciality filters such as a warming filter. There are pros and cons to each choice, and some of it will come down to personal preference and your style of shooting. I personally think that if you are looking to use a single ND filter and a polarizer, the simplest solution is to use screw-on filters and stack them together. By getting the ultra thin style polarizers that don’t have a front thread to them, you can keep your stack thickness relatively low and not have any vignetting problems. This obviously works best if all your lenses have the same filter thread diameter. If you plan on needing to stack multiple ND filters together, then you’re probably better off with a square filter system.
BONUS: What’s does my current filter kit consist of?
After receiving a couple of questions, I’m adding a quick list here of my current filter kit after its recent restructuring. I’ll have to find more time for an in-depth discussion on this kit but here’s a simple list to satisfy curiosity.
- 3-stop, 6-stop, 10-stop and 16-stop Formatt Hitech 77mm Firecrest screw-on filters
- 6-stop and 10-stop Formatt Hitech 82mm Firecrest screw-on filters
- 77mm Formatt Hitech Circular Polarizer Ultraslim
- 82mm Formatt Hitech Circular Polarizer Ultraslim
- 3-stop and 4-stop Formatt Hitech graduated ND filters (100x150mm)
- 3-stop reverse ND (100x150mm)
What’s in your kit? Which kind of filters do you use?
Leave a comment below and let me know!
Posted by Dan Carr on Shutter Muse